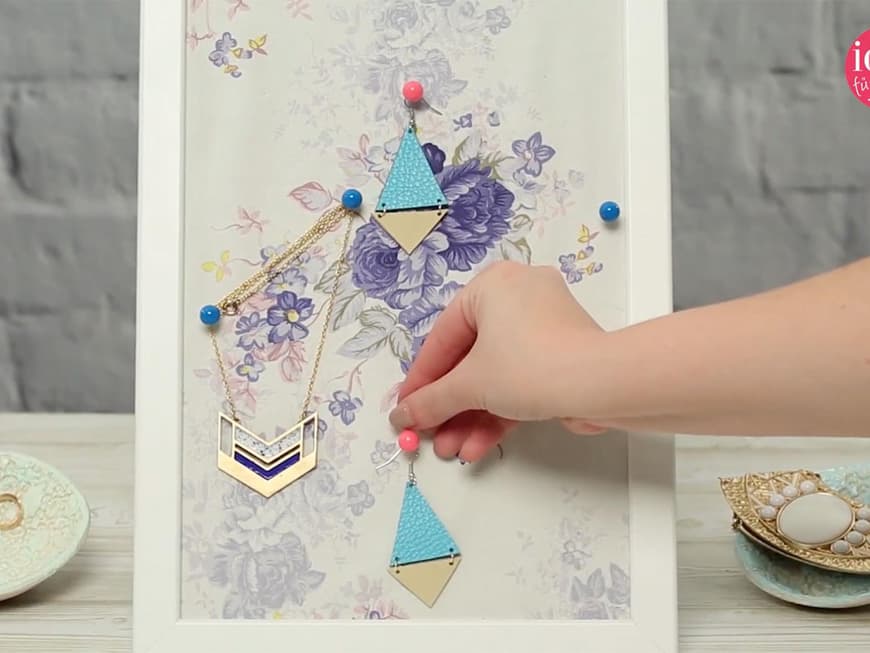
Whether in a pretty bowl, on a stand or in a jewelry box - necklaces, bracelets and rings are always tangled together and become a stubborn ball of jewelry that can only be untangled with a great deal of patience and dexterity. To put an end to this, let's make a practical and beautiful jewelry storage solution. How can we easily turn a picture frame into a jewelry holder ourselves? See for yourself:
DIY: Make your own jewelry storage
What you need:
- Picture frame
- cardboard
- fabric
- Hot glue gun or liquid glue
- Pins
Make your own jewelry holder - here's how
- Cut the cardboard to the size of the picture frame. Place it on a piece of fabric and cut it to size, leaving a border of about 2 cm all around.
- Fold the edge of the piece of fabric around the cardboard and secure it with a hot glue gun.
- Remove the glass from the picture frame and place the fabric-covered cardboard inside instead. Close it again with the back panel and place pins in the cardboard.
The homemade jewelry holder is finished and your favorite pieces finally have their own place.
You can see the exact DIY instructions step by step in the video:
$bp("brid-video-461257", {"id":"17950", "width":"740","height":"416","video":"461257", "autoplay":0,"shared":true});


